Yes, really! At time of writing, this is the only guide I know of that covers doing anything remotely advanced whatsoever with Effekseer effects in RPG Maker MZ! Leave a comment if you see any other guide that is better than this one (aside from ToastyTime’s videos which apparently cover the basics) so I can then read that better guide because I desperately want to read one. A freelance nsfw writer should not be the one to explain Effekseer tricks in MZ, but that’s how the situation is I guess, since so little about Effekseer in general has been discussed online.
This guide is also only for RPG Maker MZ, not MV or any of the other versions, which don’t have this functionality built in.
Firstly, I don’t recommend using RPG Maker engines in most cases due to the technical frustrations people have with them when trying to modify their mechanics, but you might have a really good use case (making a game with a combat system that really suits RPG Maker’s capabilities, or making a yume nikki-like game) so I won’t judge you if you’re using it anyway for those things.
Anyway, RPG Maker MZ allows you to use spritesheets for animations, but by default, attack animations use this software called Effekseer to make 3d fireballs and lightning blasts and hit effects and whatnot. You can also play animations outside of combat for stunning visuals, and they can even use 3d models. Here are some screenshots of some low effort animations I made.
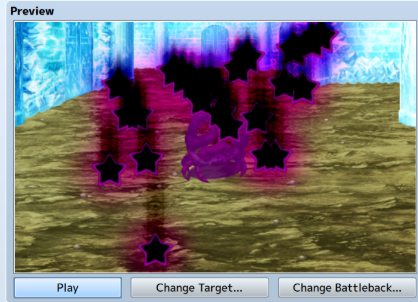
Sinister dark stars that fall on the enemy. Makes use of the subtractive blending mode.
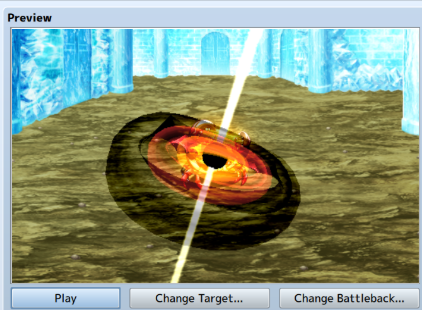
How miserable! My quasar is bugged; the back side of the accretion disc shouldn’t be visible through the central black hole. Ough. More on that later.
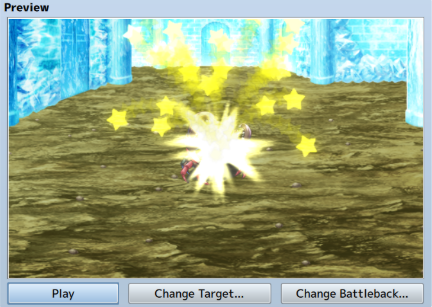
Hit effect that makes stars fly everywhere.
I’ll be using animation/particle effect/etc interchangeably to refer to Effekseer animations, so try not to let that bother you too much. I also use lots of programming terms wrong and sometimes completely avoid programming-specific terminology when it would be helpful just because I don’t know the correct term. I am also bad at explaining programming. However, because nobody better at these things than me has made a guide for using Effekseer with MZ yet, you’re stuck with my clumsy wording until either someone else makes a better guide, or until we are both dead.
I. Core Effekseer Basics
Step 1) Download the Effekseer editor, an external editor used to make and modify Effekseer animations. This is the site you get it from. You probably want the English version of the site, so click English.
Step 2) Follow the English version of this entire tutorial and then consult the tool references to learn about anything they didn’t teach you. Don’t just read it: go in the editor and replicate their process step by step, downloading any textures and stuff they ask you to download. If you spend at least an hour a day on it, it’ll take you only a few days to learn the editor to the point where you can make good looking effects, even if they’re simple.
Step 3) You are probably now better at using Effekseer than 99.9% of all people who have ever installed RPG Maker MZ in history because literally nobody uses this software????
Step 4) Make a lot of particle effects, and expand your library of textures and 3d models by hunting around for free stuff online. Make sure you’re legally allowed to use them for whatever it is you’re doing, since it’s good for your soul if you don’t have that anxiety.
II. How to Use These Things in MZ
II.a, Setup
In your project’s .js folder, make sure the “libs” folder contains an effekseer.min.js and an effekseer.wasm file. You probably already have them, but you should make sure. Then make sure the plugins folder contains some kind of EffekseerForRPGMakerMZ in it. I’m not referencing specific versions since Effekseer is getting a 1.8 update soon, but at time of writing, the beta versions of these are functional and are on the Effekseer github. I also don’t remember how many of these just come with MZ, but they are sometimes behind on Effekseer updates, so keep an eye out for new versions of these.
Then, in the plugin’s General Settings, make sure DistortionEnabled is set to False unless your project makes use of the distortion features and you don’t plan on either 1) using Point of Attraction features or 2) moving the camera while something with a trail is playing. There is a bug at the moment where setting it to True makes the particle “camera” behave in undesired ways, causing things like Point of Attraction and whatnot to behave wrongly (although some may consider this unintended functionality desirable). Trails, for example, will appear to streak along the screen if you move the camera, as they falsely believe that camera movement = real movement. Setting it to False fixes all of this.
II.b, Basic Implementation of Effekseer Particles
After making an Effekseer effect, simply go to your project’s folder and then place it in the “Effects” section, and make sure any textures, models, etc associated with it use the same relative pathing (ideally, you put textures in the textures folder or in a subfolder thereof, but any folder in your project works i guess). You can re-open that effect in the Effekseer editor after moving it if you need to manually change the pathing locations, otherwise your effect won’t have any textures.
Then, go to the Animations part of the Database and create a new entry, selecting the filename of the effect you just added. You can modify the general settings from here as desired, and add flashes and sound effects if you like.
Then, you can assign it to an attack or play it in the map using an event just like you would do with any of the stock animations. To use it in the map, use the Show Animation thing in the event selector under the Character subsection.
II.c: Things to note
A playing animation will end after the lifetime of all its components has expired. The viewer controls in the Effekseer editor do not alter when a particle expires, it’s only for demonstration purposes in the editor itself. If you use an infinite lifetime particle, this will probably result in a softlock if you use it in combat for an attack, or if you use it in the map for a cutscene that waits until it’s done to continue.
Additionally, 1 unit in the map grid is equal to approximately 1.562 units in the Effekseer grid, at least with 48x48 tiles (I have not tested other tile sizes). This can matter a lot if you want effects to be a particular size or travel a particular distance.
Finally, there are occasional clipping issues with some 3d models. I haven’t investigated different file formats of 3d model to see if using a different one fixes this, but it fucked up my quasar effect from earlier, and changing which sides of the sphere render didn’t fix it but just made the problem manifest in other weird ways. Still, it works often enough to where you can usually use 3d models safely. I can spam 3d moss balls with no issues.
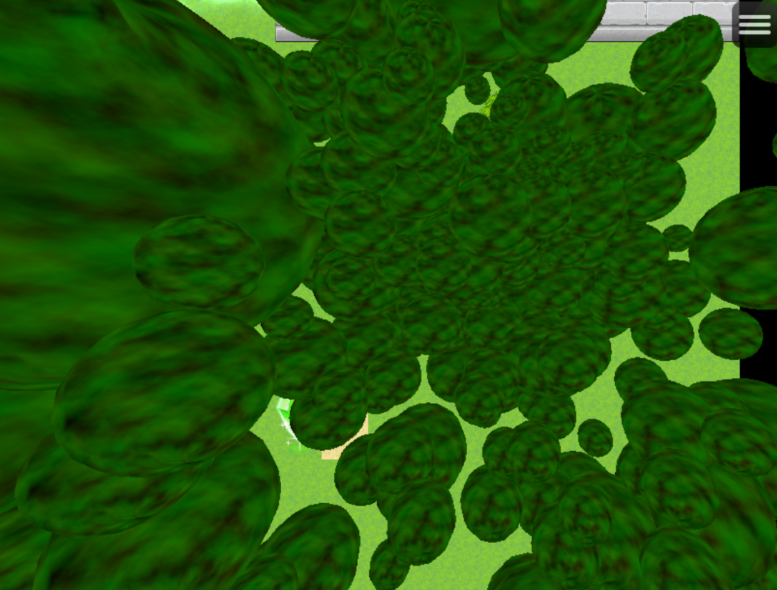
The gyrating motion of my balls is not visible in this still image. Note the perspective effect on 3d models that are very far to the sides.
Finallyer, note that detailed node information (nodes being any discrete part of an animation, like individual sparkles or all the components of a trail or just a big star) is not easily available in MZ, whether via javascript or otherwise. This means based on my current understanding, you can’t pick the position of a discrete thing in an animation, only that of the animation itself. In practice, this means that if you use Point of Attraction features to make particles home in on the player, you can’t detect if those particles have touched the player or not. The flow of information from the comprehensible parts of the game/animation to individual nodes of the animation is effectively one way with my current understanding.
Finallyest, remember that more particles = worse framerate. My okay gaming computer starts chugging when I play an animation where 500 textured stars home in on the player (with the point of attraction being updated every frame for the entire animation) while also having some turbulence, each with computationally intensive trails for a total of 8500 distinct particles as part of the animation. For bad computers I assume the limit is significantly lower, and for great ones I assume it’s significantly higher. Please keep people with worse hardware in mind: just because you can add a billion homing stars with trails doesn’t mean you should.
Oh, by the way, opening the main menu deletes all your currently playing animations. You might think it freezes them in place because that’s how pausing is supposed to work, but it doesn’t freeze them, it just deletes them. Best case scenario, your events spawn the animations back in again and they restart their animation from frame 1. Worst case scenario, you were doing complicated point of attraction stuff with them and now it's ruined. For things like waterfalls, you may consider rigging your effect up in a way that causes its entire length/height to be visible on frame 1, so it doesn’t look like the entire waterfall vanishes and starts flowing down from the top again when you close the main menu, it just looks like there was a small jump.
Finally to end all finallys, Effekseer 1.8 (a public beta at time of writing) has a collision feature, but you cannot make use of the External Collision part, only the collide with ground part. This functionality was not added to the MZ plugin, so you cannot make particles bump into anything but the ground. Although I know it is possible to add this feature yourself, you can only do it if you are good enough at programming to the point where you should really just switch engines. You will have to use hand-crafted trickery to make it look like your particles have physics if this is desired.
Also, particles have a “window” of finite size centered on the origin of the particle, and all components of the particle cut off abruptly when beyond it. I think it was about 70 tiles in width in either direction while I was experimenting? Or was it 50? Or 100? I’m not sure. You may be able to increase the size of this window via some technique, but I’m not sure how.
III. Javascript Stuff (The Harder Part)
When messing with particle effects in javascript, it’s sometimes easiest to learn by messing with the developer console in-game. If it doesn’t open automatically in another window, hit f12. Depending on what plugins you have, you may or may not create errors at some point during your experimentation, and you may or may not have to close the game and reopen it.
Console experimentation is one of the best ways of experimenting with MZ’s code if you have some leads on what to mess with, since you can do things to parts of the game that already exist and see what happens. Note that I’m not remotely good at javascript, but even I was able to hack some of this together.
For now, let’s say you have a map, and an event has a single animation playing on it. Don’t use more than one Effekseer animation on this map for this example yet if you want to try it yourself; I will explain how to use multiple effects smoothly later. If you want to do something to that particle, you need to figure out how to find it in the editor. This can be done by typing the following into the console.
SceneManager._scene._spriteset._animationSprites[0]
Remember that capitals, dots, and underscores all matter here. If you hit enter, you can see every single property of this animation in a disgustingly gigantic list/tree and go down endless rabbit holes that even lead outside of the effect and into other parts of the game, like back into the scene above it.
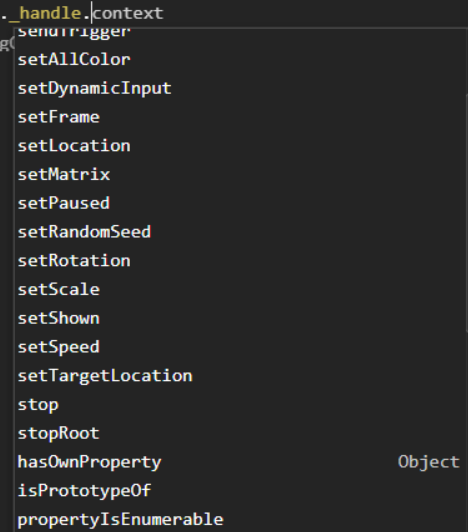
If, instead of typing enter, you type another dot, the console will show a large popup list of stuff that could come after it, such as alpha, _handle, uvs, isPlaying, and so on. Most of it isn’t very useful, but I encourage you to experiment and look for things that look like they could do something useful. I can’t give you a comprehensive list of all the things you can do with these particles. However, do note that typing _handle. after the dot brings up several especially useful things you can do to the particle, including functions that you can look at to see what they accept as inputs, then provide those inputs to change the particle in some way.
Then, to actually mess with it or read aspects of the particle, you have to type more stuff, and do something like this:
SceneManager._scene._spriteset._animationSprites[0]._handle.setShown(false)
If you type this into the console, it makes the particle effect visually vanish, but it’s still secretly there. Typing it again with true instead of false will reveal it again. You could use this for a fire effect on a fireplace that you intend to be turned on and off repeatedly.
There are many other things you can do, but here are the important ones I use:
SceneManager._scene._spriteset._animationSprites[0]._handle.setDynamicInput(X,Y)
This lets you change dynamic inputs. If you did the Effekseer tutorial, you’ll know that this is one of the ways a game engine can communicate with an Effekseer effect and tell it what to do. X here is the index of the dynamic input, and Y is the value you want. Then, presumably, you set your particle up in a way that causes the dynamic input to change some characteristic of the particle. So, if you have a particle whose size is equal to 1 times (the dynamic input plus 1), a default value of 0 would set its size to 1x its usual value. Then if you ran SceneManager._scene._spriteset._animationSprites[0]._handle.setDynamicInput(0,5) it would become 6x its previous size.
You can use a similar method to mess with the Point of Attraction. MZ’s console calls it the TargetLocation btw.
SceneManager._scene._spriteset._animationSprites[0]._handle.setTargetLocation(X,Y,Z)
X is the desired X coordinate, Y is the desired Y coordinate, and Z is 0 because you are on a 2d grid in the map. If you have one of those 3d map plugins, I have no idea how those work in conjunction with Effekseer, so good luck.
However, in practice, this is trickier to implement and requires math: here’s what I would type in to get a basic homing particle set up, assuming my particle already has a point of attraction enabled and configured on it.
SceneManager._scene._spriteset._animationSprites[0]._handle.setTargetLocation(((1.562($gamePlayer._realX)) - (1.562($gameMap.event(1)).x)), ((-1.562($gamePlayer._realY)) + (1.562($gameMap.event(1)).y) +0.5), 0)
This gets the player’s current relative position to the event the animation is centered on, converts it into units Effekseer can understand, accounts for the fact that Y is flipped between Effekseer and MZ, accounts for the fact that Effekseer coordinates are centered on the origin of the effect and not the map itself, adds a +0.5 offset to the Y to make it seem to behave similarly when approaching from the top and bottom, and then finally delivers all that to the particle. I also use realX/Y for the player so that the particle reacts more smoothly to the player as they move from tile to tile. There is also an MZ function built in that tells you the relative distance between two things, but I forget what it is, and I didn’t use it here.
By the way, this is just how to change the location to your current one, once, in the console. In-game, you’ll want this to be running every time you want the function to update the point, which could be every frame in the map where this particle effect is active.
When running it in an event, you’ll want to do something like this in a parallel event that runs every frame:
SceneManager._scene._spriteset._Particle1._handle.setTargetLocation(((1.562($gamePlayer._realX)) - (1.562($gameMap.event(this._eventId)).x)), ((-1.562($gamePlayer._realY)) + (1.562($gameMap.event(this._eventId)).y) +0.5), 0)
See other MZ javascript guides for what the “this” i use in here does.
Anyway, you may notice that I don’t use _animationSprites[0] here, and that’s because I wanted this code to work regardless of where the index of this particle effect is. If you have multiple effects running at once, it can be hard to figure out which one has the ID you want. It gets even worse when stuff is being created and destroyed, because if a particle is destroyed, the next particle will move back to take its place, which will ruin everything.
However, there’s a way to assign a specific particle to an alias that’s distinct from its ID, and you do it like this:
SceneManager._scene._spriteset._Particle1 = SceneManager._scene._spriteset._animationSprites[SceneManager._scene._spriteset._animationSprites.length -1]
Replace “_Particle1” with whatever you want to name it, and don’t give two particles the same name. How this works is that it takes whatever the most recently created particle is (since they start counting at 0, it’s equal to the length of the list minus 1) and then it just swaps it over to a new thingie independent of that list.
This does rely on nothing else being created between the time this particle is created and destroyed, so don’t create other particles in the few frames afterward just to be safe.
So, to create an event that automatically creates an animation with a point of attraction always centered on the player, that doesn’t care about other animations existing, you do this:
step 1) Have parallel trigger event, and have it wait for any other animations to be safely done spawning in if needed
step 2) Show Animation: This Event, [effect you want]
step 3) Wait 1 frame (this is necessary i think)
step 4) Script: SceneManager._scene._spriteset._part1 = SceneManager._scene._spriteset._animationSprites[SceneManager._scene._spriteset._animationSprites.length -1]
Step 5) Wait 1 frame (Also necessary i think)
Step 6) Loop this continuously: SceneManager._scene._spriteset._part1._handle.setTargetLocation(((1.562($gamePlayer._realX)) - (1.562($gameMap.event(this._eventId)).x)), ((-1.562($gamePlayer._realY)) + (1.562($gameMap.event(this._eventId)).y) +0.5), 0)
Step 7) Wait 1 frame (Prevents game from exploding for sure)
Repeat step 6) and 7) forever
Anyway, that’s the most advanced thing I can currently do with Effekseer in MZ, but lots of other stuff works similarly. You really just do SceneManager._scene._spriteset._part1.[function that does whatever you want or thing that tells you a specific property you want to read] and then boom.
More additional weird stuff you can do to the particle: (Assumes you named your particle _part1 for convenience)
SceneManager._scene._spriteset._part1.mirror = true: Mirrors your particles and their movement along an axis, flipping them to the other side horizontally. I don’t know exactly what determines where the axis is because I haven’t looked into this too much.
SceneManager._scene._spriteset._part1._handle.setPaused(true): Freezes your particle in place. Set it back to false to unpause it.
SceneManager._scene._spriteset._part1._targets = (thing to center it on here): Centers the particle on something else instead of whatever you already centered it on. I do not know what can count as a valid target. On discord, SnakekillerX sent me this screenshot of some code, which when run in the console, caused the animation playing on an enemy to suddenly change location to an actor in combat.

SceneManager._scene._spriteset._part1._handle.sendTrigger: Allows you to send triggers to the particle; see the Effekseer documentation for more details, but it lets you make new parts of the particle appear or change behavior of existing ones. For example, you can make an energy charging effect, and then when you send it a trigger, it fires a big visual laser. If you’re using this for an environmental hazard, you could have some turrets have the charging effect on them, and then when the player steps in front of them, you send the trigger to the turrets while dealing some damage to the player.
SceneManager._scene._spriteset._part1._handle.setLocation: This actually only sets the location for one frame and then it immediately zoops back to where it was earlier. Causes funky stuff to happen with trails as a result.
If you’re at all interested, console experimentation and then using similar code in events should be enough to get you started, and hopefully you can make better breakthroughs than I could. There are other things that you can do on the fly, but if you’re at the point where you’re typing javascript into the console, you don’t need me to tell you how to do them since you’ll see a lot of them pop up.
IV. Other Things You Could Try/Speculative Practical Uses
You could use javascript to have these animations play on something other than an event or player, like an invisible projectile that moves around and itself can collide with things. This would probably be handy for real time combat plugins or for nice visuals on things in general.
Also, if you find that some kind of spritesheet has the functionality you want, you can always convert your effekseer animation into a spritesheet. Or, alternatively, you can do it the other way around and use scrolling textures in effekseer to mimic spritesheets as needed.
If you can fix the DistortionEnabled bug in MZ (the effekseer github is public if you wanted to give them that fix too), I assume you could get a lot of value out of using distortion effects in your game, like for strange magic or intense heat effects.
Also, one obvious thing you could rig up with a plugin is having spell effects/projectiles move from the user to the target, like a stream of fireballs or sinister glowy magic or just bullets from a gun.
You may also use this to display debuff effects on a character in the map while afflicted with said debuff. You could use javascript or a plugin to check if the player has a debuff and then play an infinite length animation, and then maybe when they get cured of it, the animation stops. (Make sure that if there's a map transition, the main menu is opened, or you enter combat, the animation starts up again afterwards)
I believe it is also possible to use the position of the mouse cursor for things, in case you wanted to do something with that. It likely uses different units than the map grid, so you'll need to do extra math to convert it to effekseer coordinates. Maybe you can make a flamethrower effect that aims at the cursor, and then some other logic lets it burn goblins. Keep people who play RPG Maker games with keyboards in mind if you do this though.
V: Conclusion
That was honestly a mess. If you have questions or find something confusing, please leave a comment and I might edit the guide to answer them.